MENU
Create React App
Create React App (CRA) used to be the official, zero-configuration way to scaffold a new React project. In February 2025, the React team officially deprecated Create React App (see the "Sunsetting Create React App" post on react.dev): it is no longer maintained and lacks built-in support for routing, data-fetching, and code-splitting that modern React apps need. Do not use Create React App for a new project. For a lightweight, buildless-tooling setup, use Vite instead (npm create vite@latest); for a framework-first path with routing and data-fetching built in, use Next.js or a framework such as React Router in framework mode. The rest of this section walks through Create React App for reference and for readers who maintain an existing CRA project.
Make sure you have Node (or Yarn) installed first, then run:
| npx create-react-app my-appcd my-appnpm start |
(If you've previously installed create-react-app globally via npm install -g create-react-app, we recommend you uninstall the package using npm uninstall -g create-react-app or yarn global remove create-react-app to ensure that npx always uses the latest version.)
This launches the development server and displays a webpage:
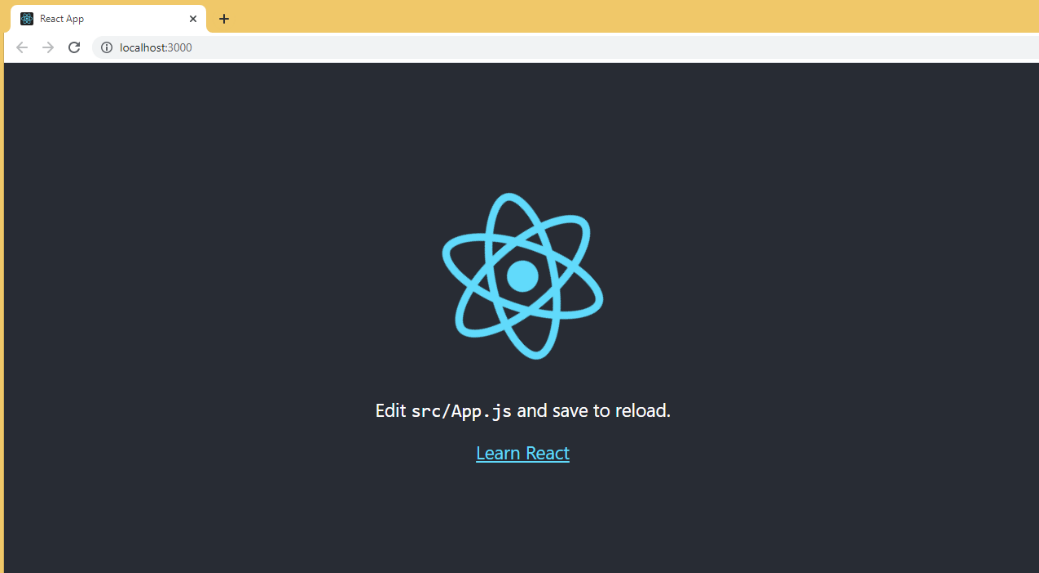
Notice it says 'Edit src/App.js and save to reload.'. The development server watches for changes in relevant files. So, you will see changes immediately on the browser as you modify and save the file src/App.js, which originally looks like this:
import logo from './logo.svg';import './App.css';function App() {
  return (
    <div className="App">
      <header className="App-header">
        <img src={logo} className="App-logo" alt="logo" />
        <p>
          Edit <code>src/App.js</code> and save to reload.
        </p>
        <a
          className="App-link"
          href="https://reactjs.org"
          target="_blank"
          rel="noopener noreferrer"
        >
          Learn React
        </a>
      </header>
    </div>
);}export default App;'src/index.js' looks like this:
import React from 'react';
import ReactDOM from 'react-dom/client';
import './index.css';
import App from './App';
import reportWebVitals from './reportWebVitals';

const root = ReactDOM.createRoot(document.getElementById('root'));
root.render(
  <React.StrictMode>
    <App />
  </React.StrictMode>
);

// If you want to start measuring performance in your app, pass a function
// to log results (for example: reportWebVitals(console.log))
// or send to an analytics endpoint. Learn more: https://bit.ly/CRA-vitals
reportWebVitals();Create-React-App just creates a frontend build pipeline, so you can use it with any backend you want. Under the hood, it uses the bundler Babel and forward-compatible compiler Webpack, but you do not need to know anything about them.
Notice above how images are imported for use in React. Alternatively, you can do this since Create-React-App uses WebPack:
<img src={require('path/to/one.jpeg')} />To launch the website on a particular browser, create a file named '.env' on the root directory of the project and set the variable 'BROWSER', eg.:
| BROWSER=chrome |
To use a different port on a Windows machine, modify package.json:
| "start": "set PORT=3006 && react-scripts start" |
When you are ready to deploy to production, running 'npm run build' will create an obfuscated and minimized build of your app in the build folder. You can press CTRL-C to stop the development server first.
Again, the workflow above applies to existing Create React App projects. For any new React project today, skip Create React App: run npm create vite@latest and pick the React template for a lightweight setup, or start with a framework like Next.js if you want routing and data-fetching built in.